

Let's create a React App
In this follow along step-by-step tutorial you'll build a weather app.


Hello World
We are all by now, familiar with the age-old Hello World tutorials. It's often used to start a total newbie off with a simple line of code that will output something. Well I'm tired of those, and I don't find them particularly helpful. Now those of you who are experienced React JS developers you'll probably have a lot to say about how this project and it's structure looks, but the fact is, I am attempting to keep this as simple as possible to make it easy to follow whilst moving away from the standard "hello world" example.
So what are we going to make? If not Hello World?
We're going to create an app where we can visualise data on a map.
Assumptions
Moving forward I'm going to assume the following things:
- You know the basics of HTML.
- You know the basics of CSS
- You know some JavaScript
- You have used the terminal/powershell
Let's get started
Okay, so before we get started we wanna check you have Node JS installed. Because you're going to need the node package manager. If you're not sure what that is, here you go. You're welcome 😉
You will need a Node version >= (greater than or equal to) 14.0.0. You can type this command in your terminal/powershell to determine your version:
› node --version
In short, npm is the node package manager, it is where you can install packages to use in your javascript applications. For now, that is all you need to know about it. Let's check whether you have npm. So you want to open up your terminal or powershell and execute the following command:
# the following should output:
# 7.24.1
# if you have the latest version of npm.
› npm --version
If you do not have npm installed, follow these steps.
Step 1: create your react app
To create your react app, go to the directory you'd like to store your project in and execute the following command:
# in my case, I want to store my app in my JavaScript
# folder in my projects directory
# so I change to my projects directory
› cd ~/projects/JavaScript
› npx create-react-app weather-app
sidenote: you may be told you need to install the following packages: create-react-app and then be asked if it is okay to proceed. If so, type 'y' and hit enter.
Step 2: run your app
You should be able to see your app in the browser immediately, from your terminal run the following commands:
› cd weather-app
› npm run start
It should open up a new tab in your browser and look like this:
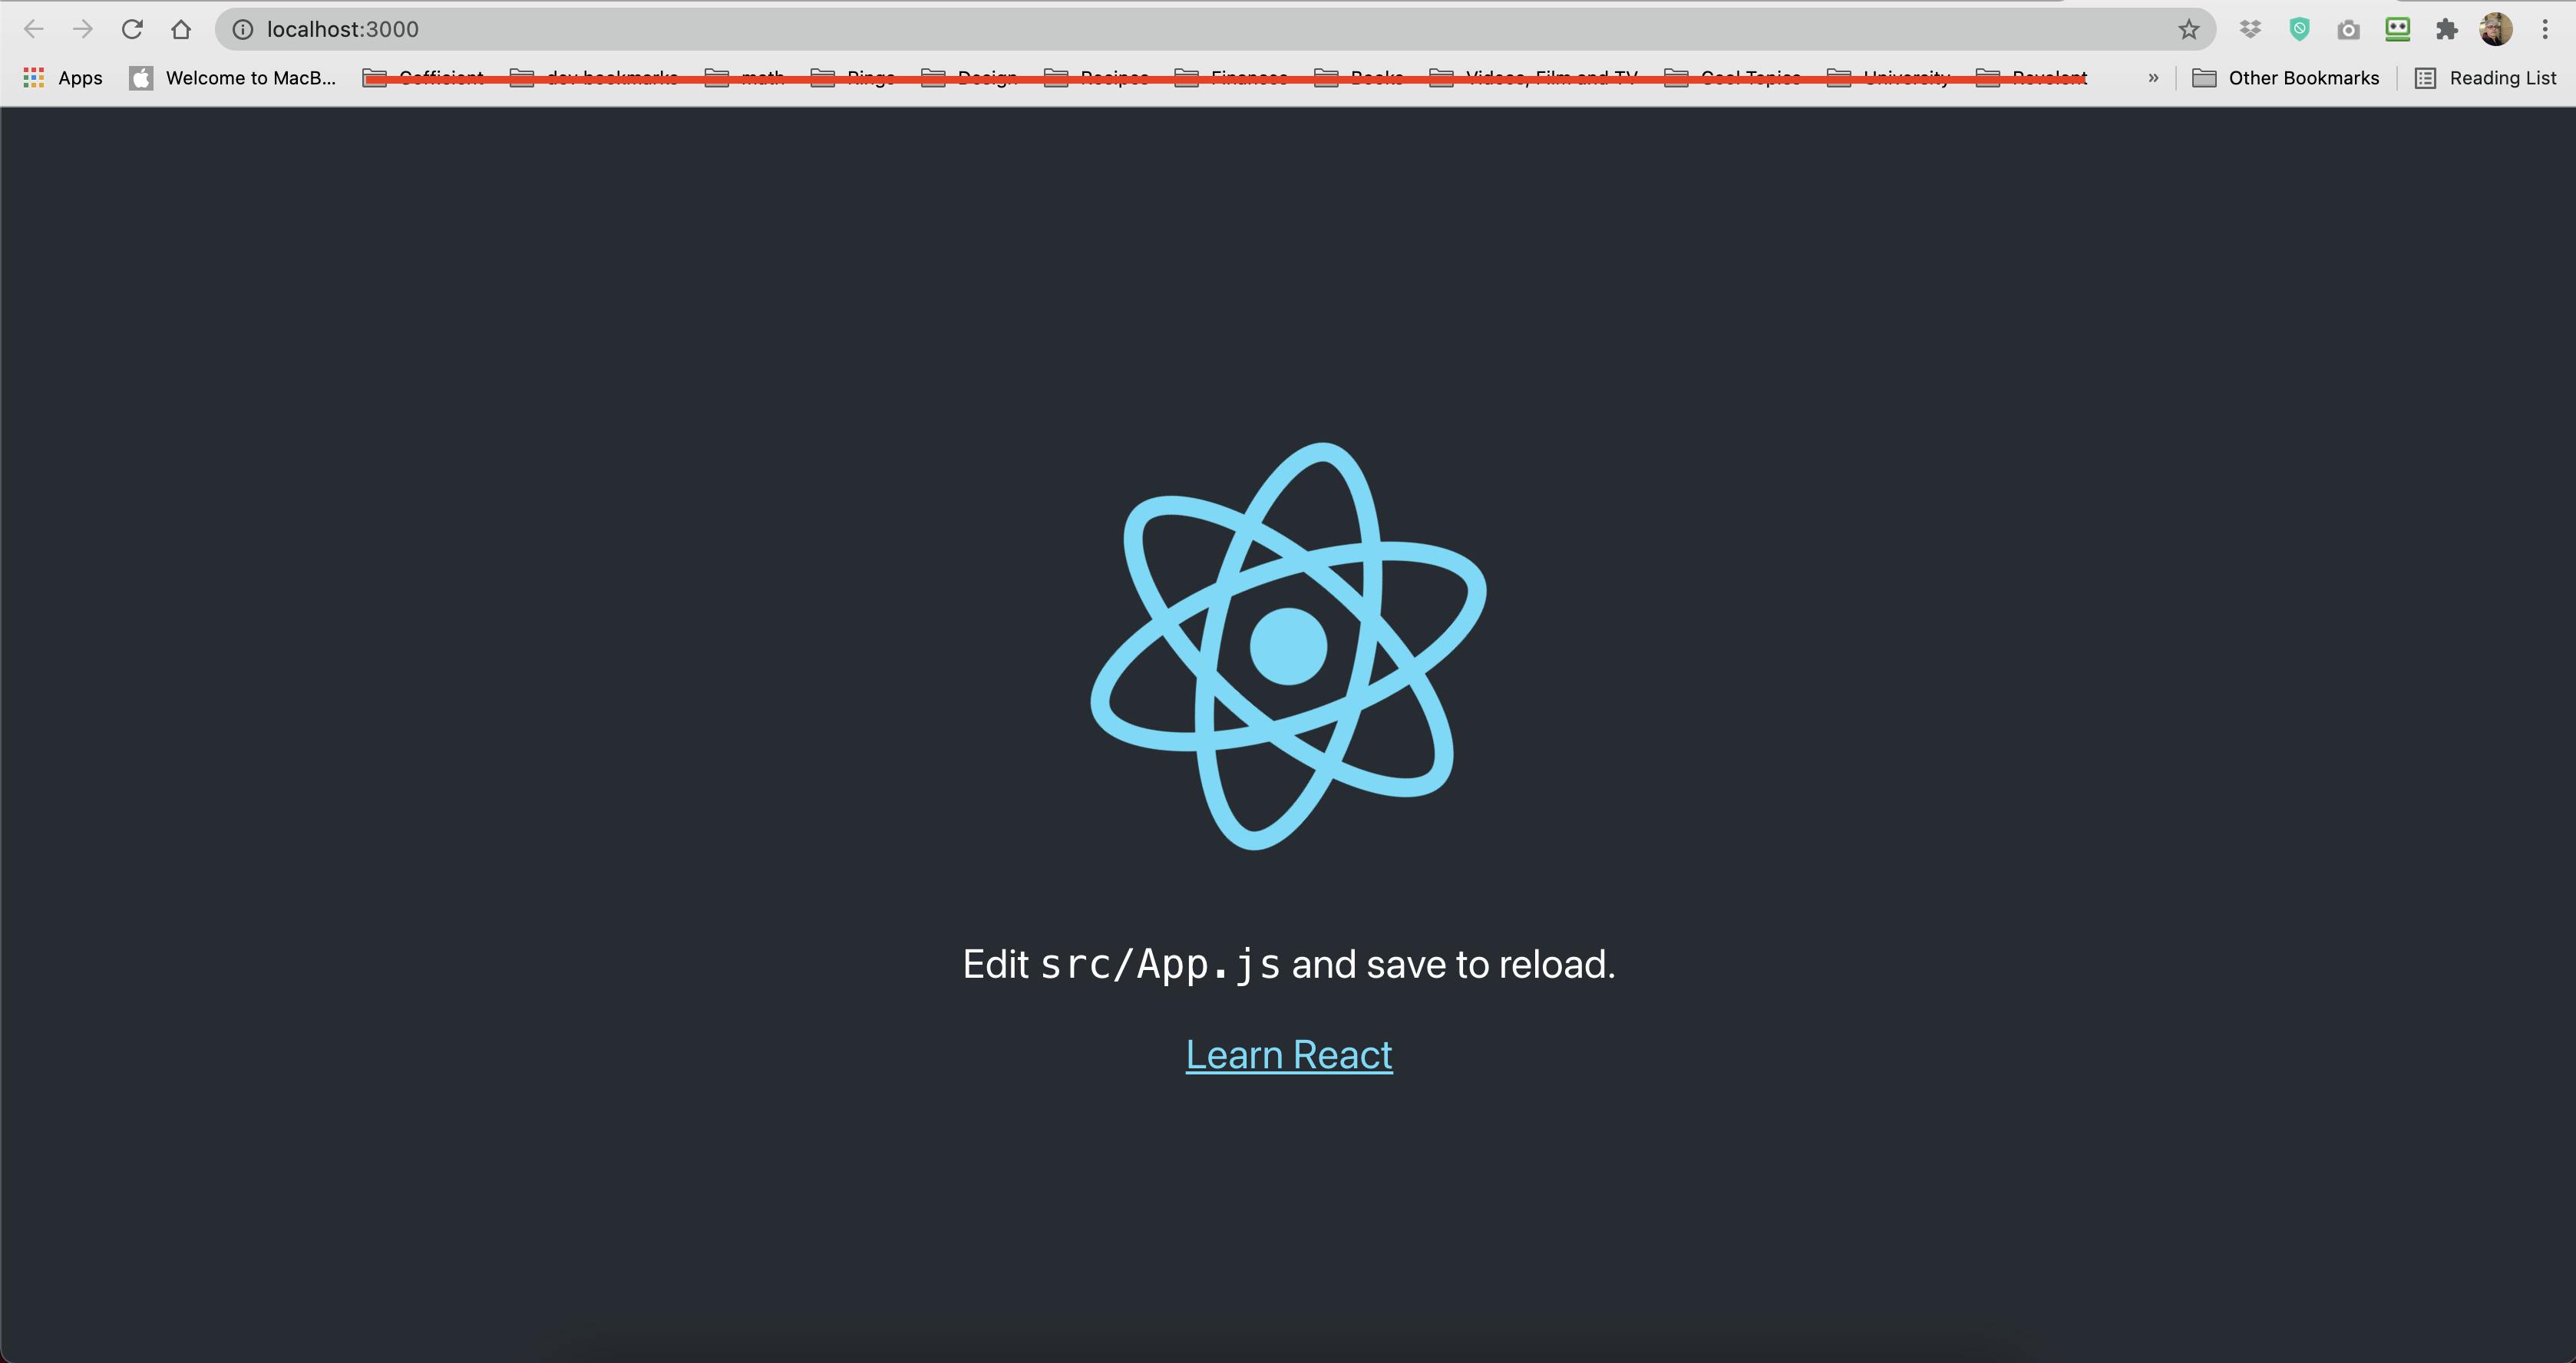
Great! Your react app has been created and is compiling correctly.
Step 3: let's get you a map!
What kind of weather app would we have if you weren't able to select a location? A CRUDdy one! 🥁 Ba Dum Tss.
So we want to get a map, that isn't too complex to get set up. I use MapBox GL in my applications because it's easy and quick to set up. We're going to need to open our terminal again. and run the following command:
› npm install -g react-map-gl
Now you want to open your project in VS Code and open your App.js file. It should look like this:
import logo from './logo.svg';
import './App.css';

function App() {
  return (
    <div className="App">
      <header className="App-header">
        <img src={logo} className="App-logo" alt="logo" />
        <p>
          Edit <code>src/App.js</code> and save to reload.
        </p>
        <a
          className="App-link"
          href="https://reactjs.org"
          target="_blank"
          rel="noopener noreferrer"
        >
          Learn React
        </a>
      </header>
    </div>
  );
}

export default App;
You want to remove the following code from this file:
<header className="App-header">
    <img src={logo} className="App-logo" alt="logo" />
    <p>
    Edit <code>src/App.js</code> and save to reload.
   </p>
    <a className="App-link"
       href="https://reactjs.org"
       target="_blank"
       rel="noopener noreferrer" >
        Learn React
    </a>
</header>
Your file should now look like this:
import logo from './logo.svg';
import './App.css';

function App() {
  return (
    <div className="App">
    </div>
  );
}

export default App;
Now we want to create a component for the Map, so in your src folder, right click and select, New Folder. Call it components. Then, inside this folder we want to create a new file called map.js.
Great! Let's get the map in there now. You want to import it into your map.js file, so at the top of the file, add the following import:
import ReactMapGL from 'react-map-gl';
We're going to use functional components for this, so we need to create our functional component. We can do this by adding the next two lines:
function Map(){}


export default Map;
In React our components return what we want to render, so we need to add a return statement, and include the ReactMapGL component inside it, like so:
function Map(){
    return (
        <ReactMapGL>

        </ReactMapGL>
    );
}
To render our map, we need to pass a few attributes to the element. The first is the viewport, this is the information that defines how the map renders and which location it renders showing. We're going to use state to define the initial values for this. So we neeed to import useState from React. We do so like this (remember imports always go at the top of the file):
import { useState } from 'react';
Now we want to create a state variable and define a function to set it. So inside our Map function, we want to add the following code above our return statement:
  const [viewport, setViewport] = useState({
    width: "100vw",
    height: "100vh",
    latitude: 41.3874,
    longitude: 2.1686,
    zoom: 8
  });
In this code we are setting the height of the map to the entire page height, and the entire page width. We will have a fullscreen map. We are setting the co-ordinates to Barcelona which I randomly generated for this article . You can find the coordinates of your city using google. N = latitude, E = longitude.
Now we want to add this to our map component as an attribute as well as a way to change the viewport information if we change position on our map. We can do so with the following code:
function Map(){
    const [viewport, setViewport] = useState({
        width: "100vw",
        height: "100vh",
        latitude: 41.3874,
        longitude: 2.1686,
        zoom: 8
      });

    return (
        <ReactMapGL
            {...viewport}
            onViewportChange={(viewport) => setViewport(viewport)}
        >

        </ReactMapGL>
    );
}
Let's go to mapbox in our browser and register a new account, once we've done so, we can go to our account here. You will see a navbar at the top, click on Tokens. You'll see either a token there, or an option to create a token. If you have a token, copy it, if not create one and copy it. Paste your token into the following attribute on your ReactMapGL component like so:
function Map(){
    const [viewport, setViewport] = useState({
        width: "100vw",
        height: "100vh",
        latitude: 41.3874,
        longitude: 2.1686,
        zoom: 8
      });

    return (
        <ReactMapGL
            {...viewport}
            onViewportChange={(viewport) => setViewport(viewport)}
            mapboxApiAccessToken="[your token goes here]" >

        </ReactMapGL>
    );
}
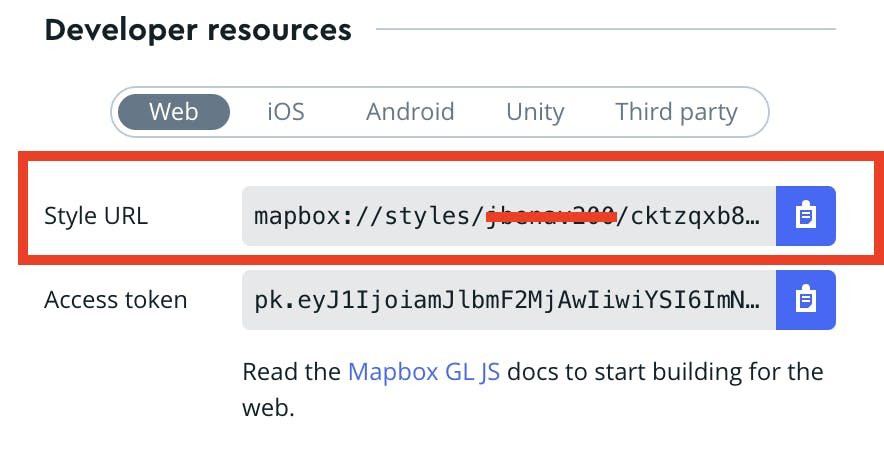
Now we want to add a style to our map. I use the satellite style for this article. You can configure your styles by going to MapBox Studio, click on Styles and then click the new style button. To get your style link, once you've selected one you like, click share at the top and select the following option:
To add it to our map, we just need to add the following attribute:
function Map(){
    const [viewport, setViewport] = useState({
        width: "100vw",
        height: "100vh",
        latitude: 41.3874,
        longitude: 2.1686,
        zoom: 8
      });

    return (
        <ReactMapGL
            {...viewport}
            onViewportChange={(viewport) => setViewport(viewport)}
            mapboxApiAccessToken="[your token goes here]"
            mapStyle="[your style url goes here]" >

        </ReactMapGL>
    );
}
Now we want to add our map to our App.js file: We need to import it and then include it as an element inside our app div:
import logo from './logo.svg';
import './App.css';
import Map from './components/map';


function App() {
  return (
    <div className="App">
      <Map>
      </Map>
    </div>
  );
}

export default App;
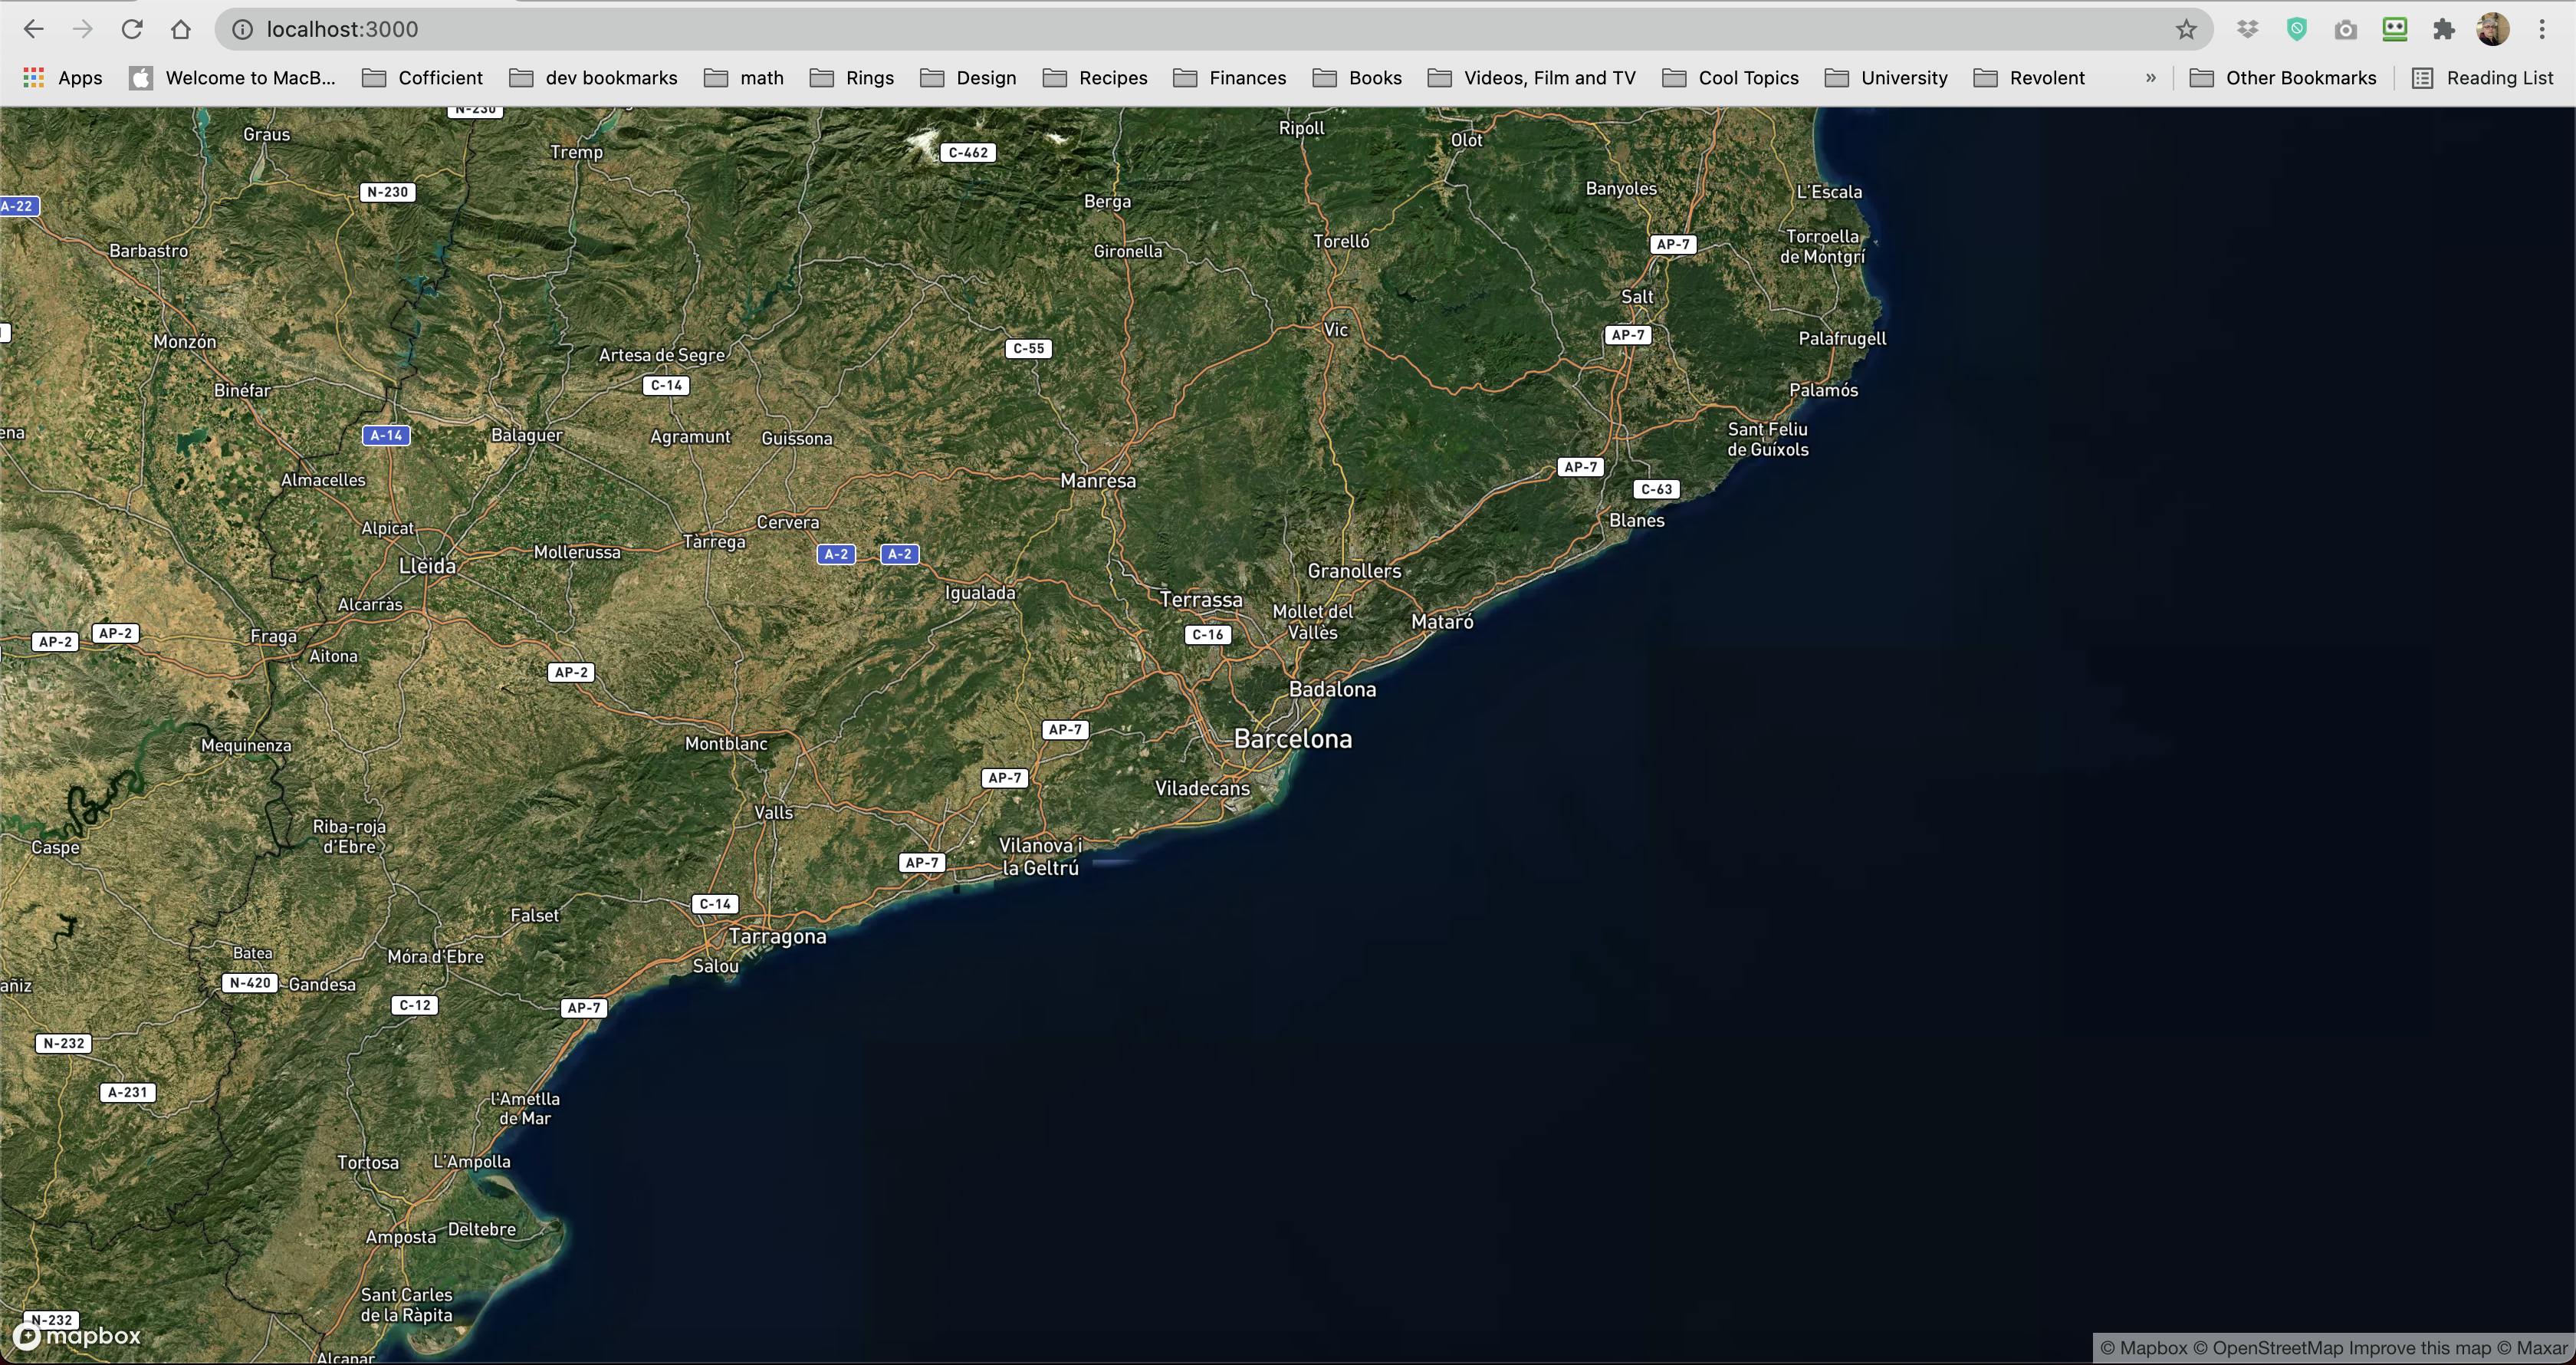
Now when we run npm run start we should see something like this:
Step 4: get user input
We want weather data for a user defined city, so for this we need a form. We're going to use an InputGroup. To do this, we need react-bootstrap. In your terminal, run the following command making sure you're in the correct directory for your project:
› npm install --save react-bootstrap
Now you want to go back to your map.js file and add the following code:
import ReactMapGL from 'react-map-gl';
import 'bootstrap/dist/css/bootstrap.min.css';
import { Button, InputGroup, FormControl } from 'react-bootstrap';
import { useState } from 'react';

function Map(){
    const [viewport, setViewport] = useState({
        width: "100vw",
        height: "100vh",
        latitude: 41.3874,
        longitude: 2.1686,
        zoom: 8
      });

    const [state, setState] = useState({
    city:'',
    country: '',
    temperature: 0,
    windSpeed: null,
    humidity: null,
    });

    const updateCity = (e) => {
    setState({city: e.target.value});
    }

    const handleKeyDown = (e) => {
        if (e.keyCode === 13){
          // get data
        }
      }

     return(
            <ReactMapGL
            {...viewport}
            onViewportChange={(viewport) => setViewport(viewport)}
            mapboxApiAccessToken="[your token goes here]"
            mapStyle="[your style url goes here]" >
                <InputGroup className="input-frm">
                    <InputGroup.Text className="input-lbl">City:</InputGroup.Text>
                    <FormControl aria-label="Input City" value={state.city} placeholder="enter city" onChange={(e) => updateCity(e)} onKeyDown={handleKeyDown} />
                    <Button variant="success">Search</Button>
                </InputGroup>


        </ReactMapGL>
     );

}


export default Map;
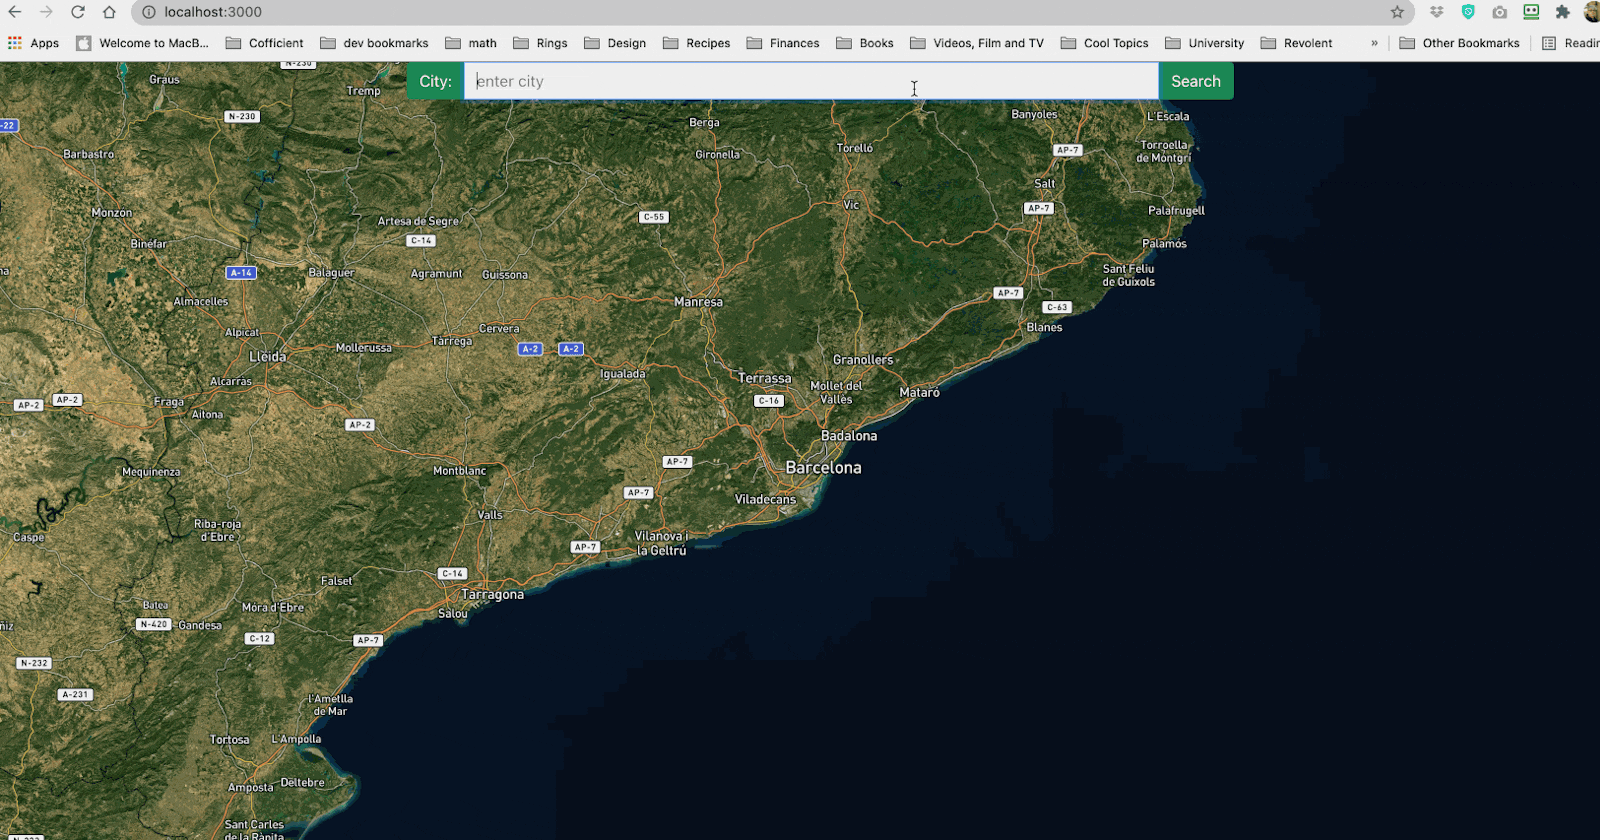
In the above code, we've set a new state property, called state, which exists as an object with multiple properties. These properties will help us visualise our data on the map in the next step. This won't look fantastic as is, and will display as a large bar across the top of our app page.
So let's add some styling to this. We want to open our index.css stylesheet from the src folder. and add the following code:
.input-lbl {
  background: #198754 !important;
  border-color: #198754 !important;
  color: white !important;
}

.input-frm {
  max-width: 50vw !important;
  margin: 0 auto;
}
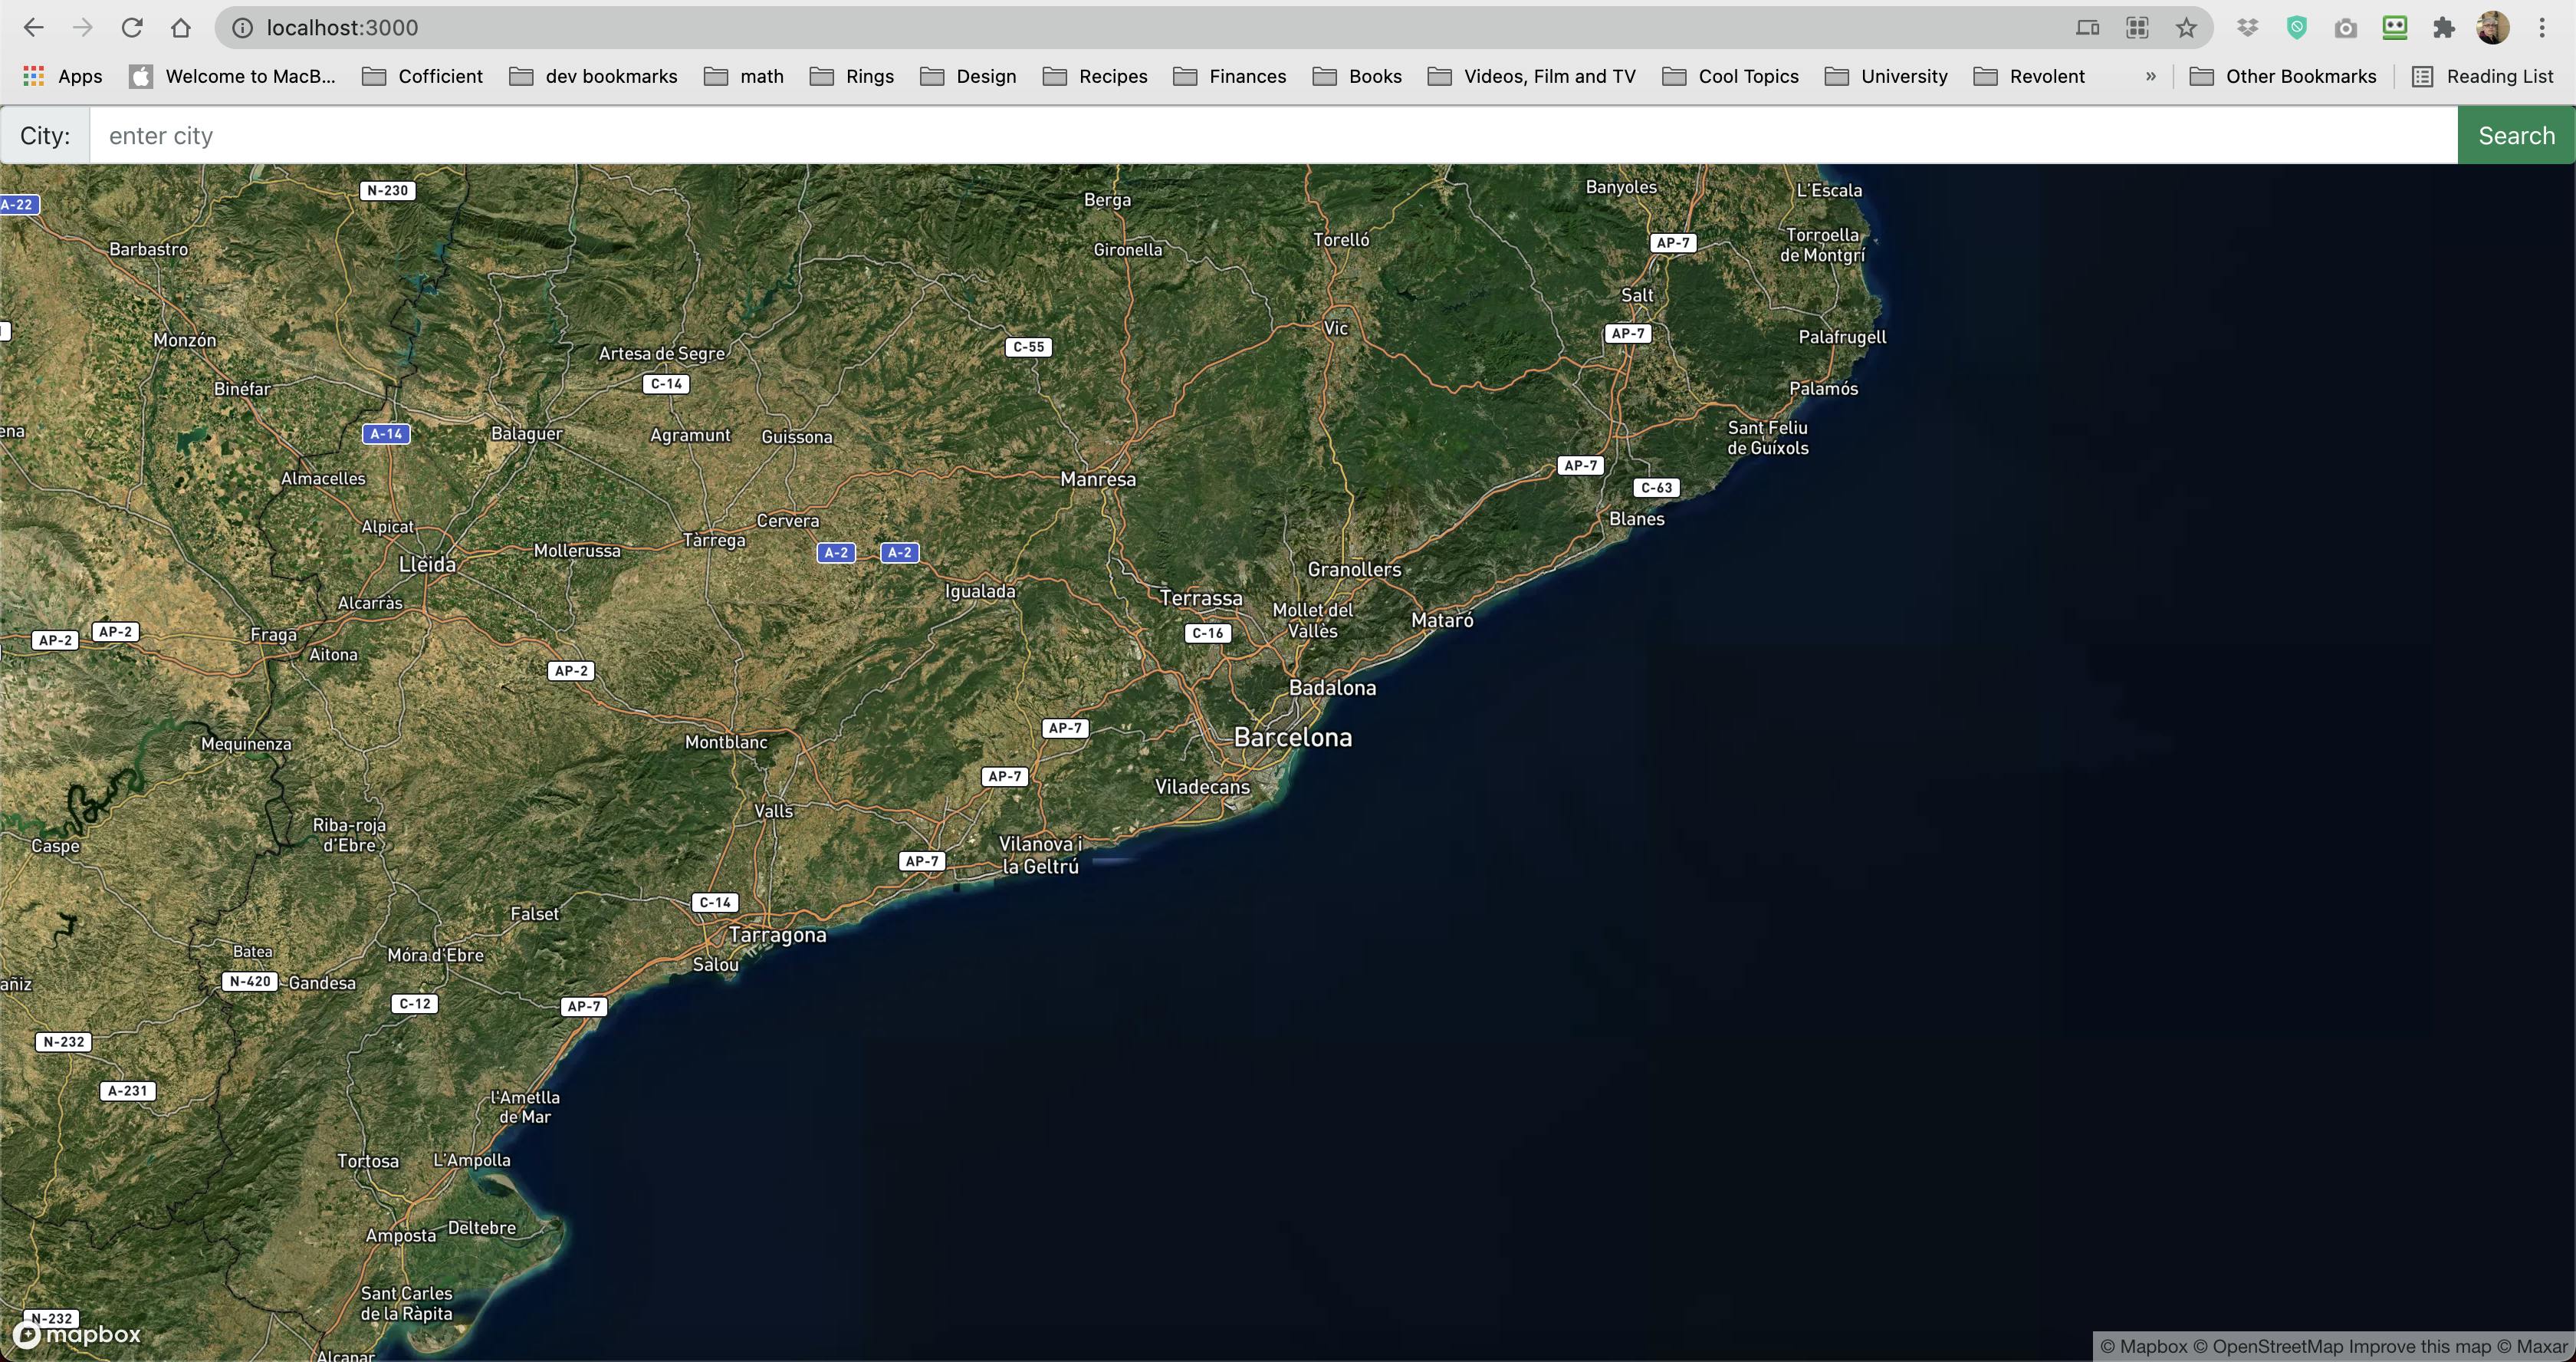
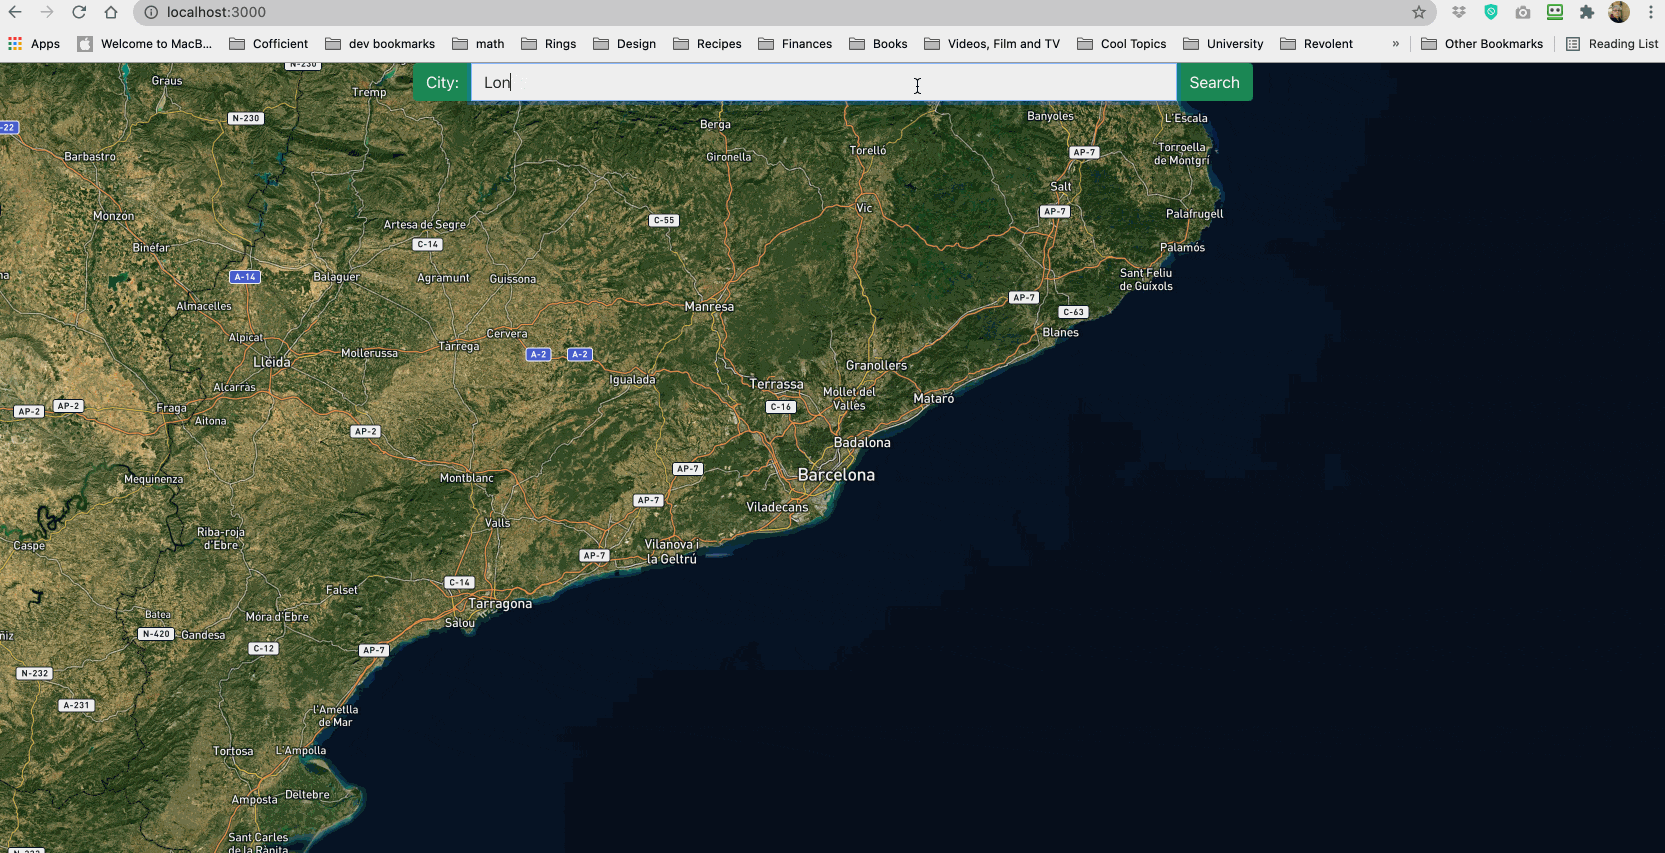
Our app should now look like this:
Wow! It already looks great!
Step 5: let's request some weather data
You might be curious as to how we're going to get our weather data. We're going to use an API Callout. This is something you will probably have to do many times in many different projects.
We handle API Callouts in two parts, a request and a response. In this step we're going to make the request.
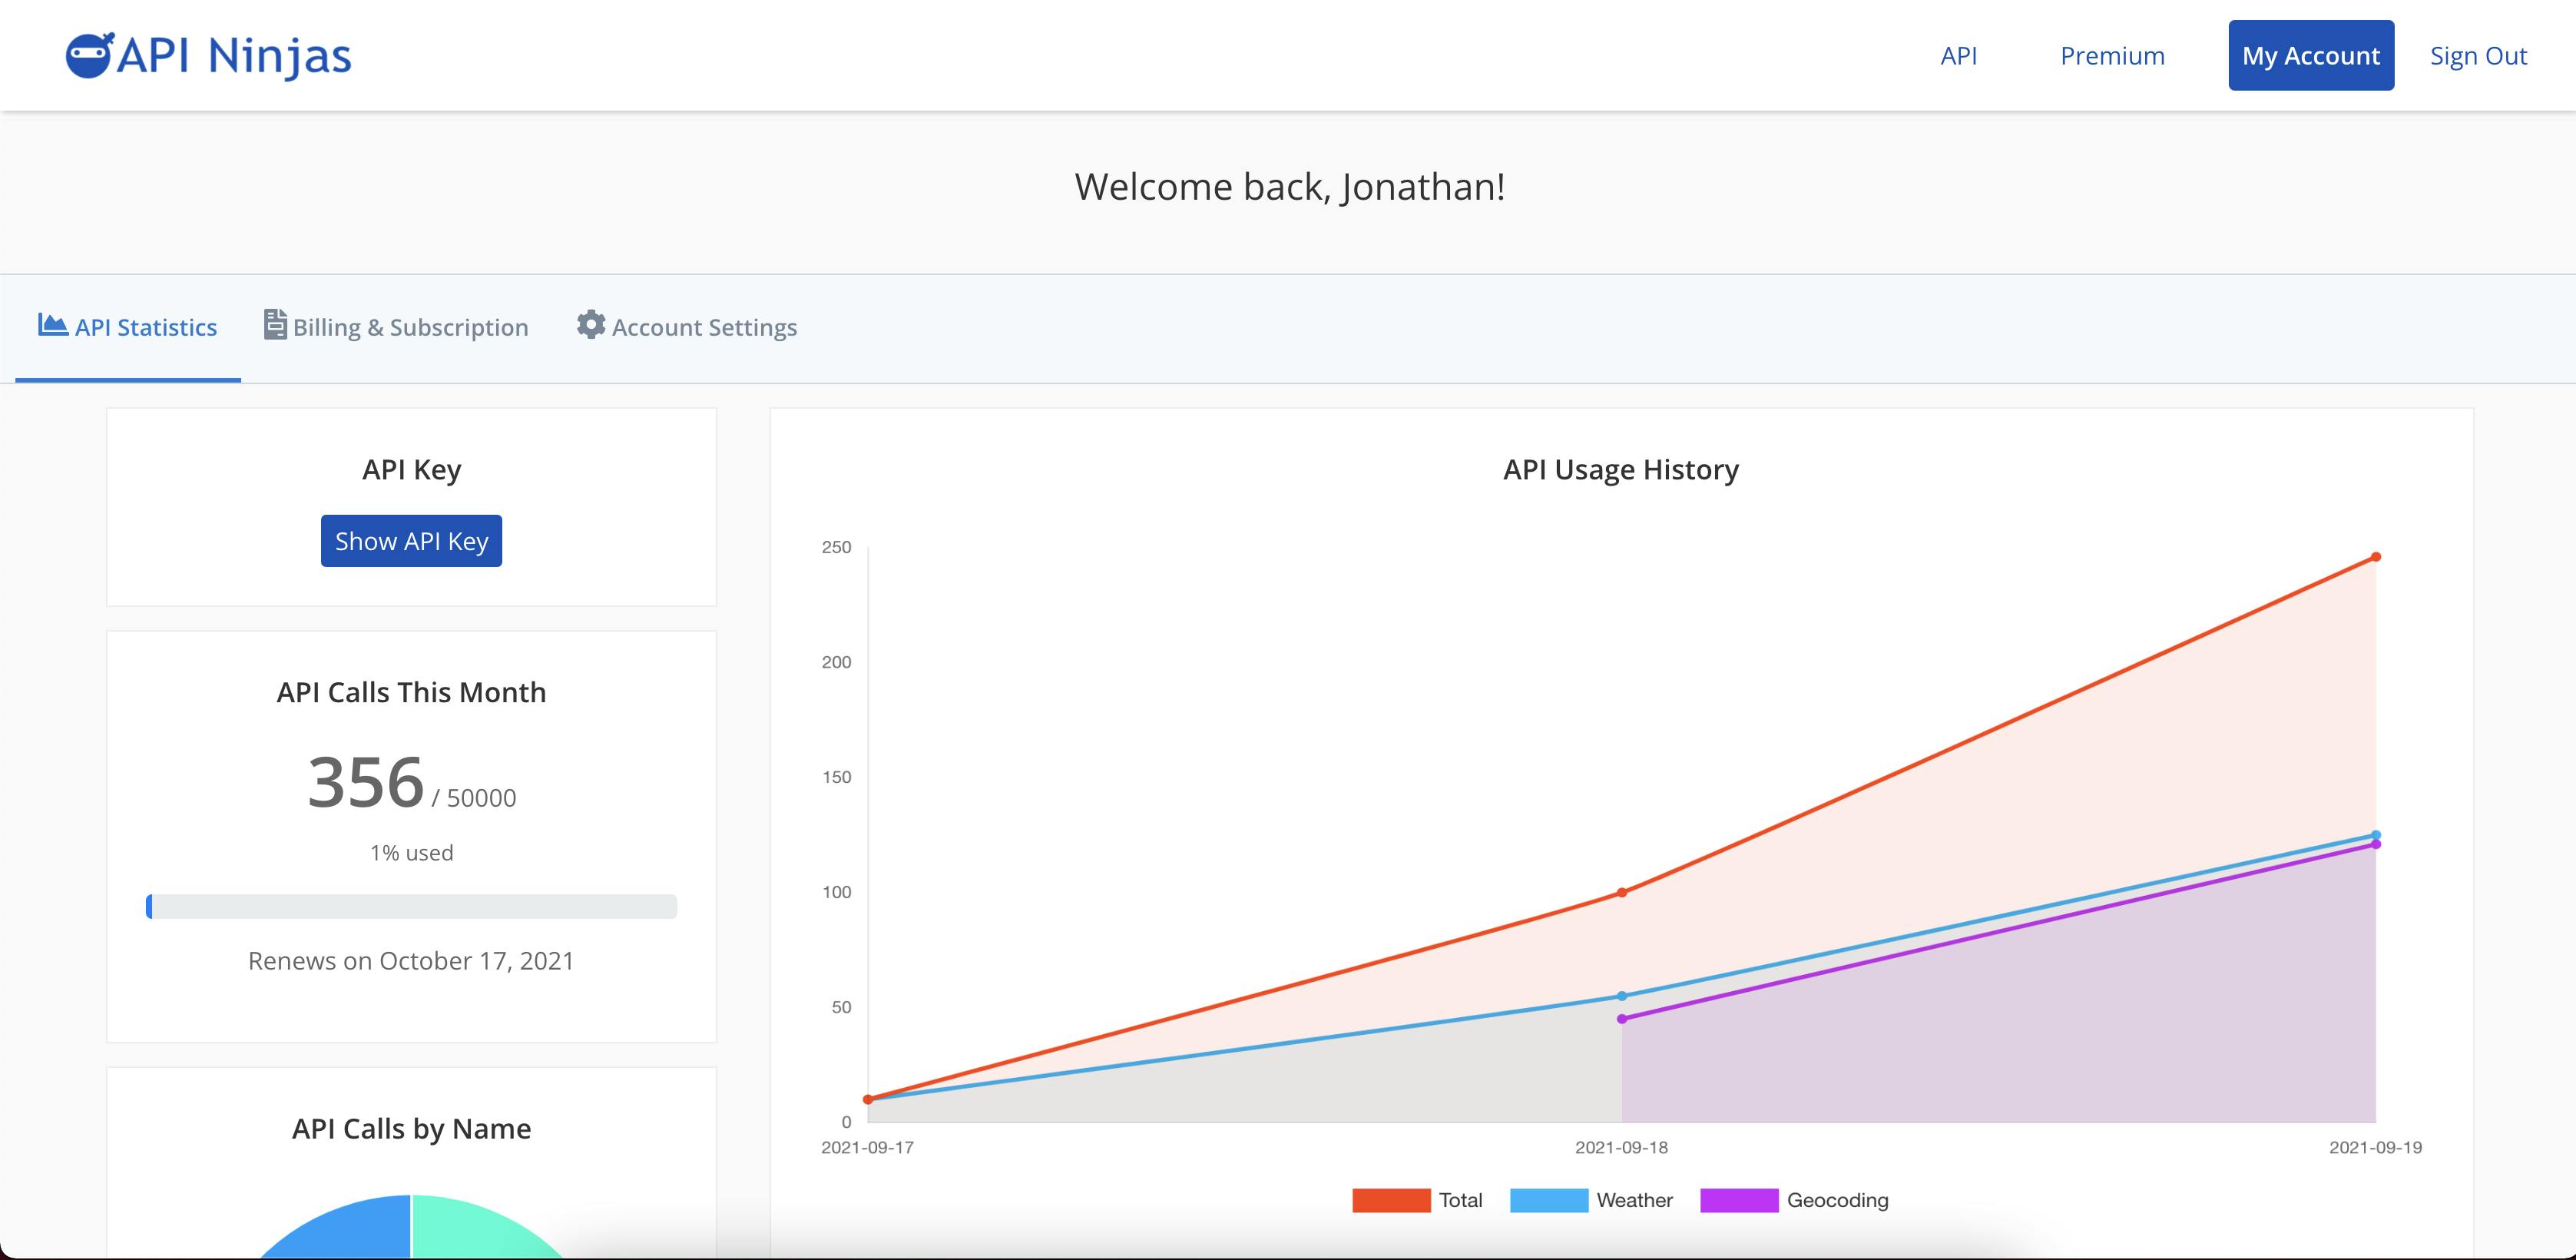
I'm using the API Ninjas Weather API for this example, but you should be able to use any other you like with a similar callout. Although this API is provided for free you will still require an API Key. To get one click here and follow the instructions for creating an account. Once you've created an account, you should see a page like this:
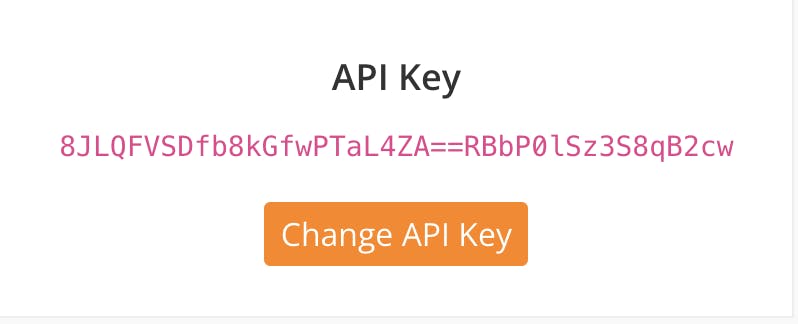
You want to click Show API Key, it should look something like this:
All good? Fantastic, let's move on!
We need to replace our button in the map.js file with the following code:
<Button variant="success" onClick={getData} >Search</Button>
Let's add a getData function to our component. We can add it under the handleKeyDown function:
  const getData = () => {
    getLongLat();
    getWeather();
    setTimeout(() => {
      setMarkerTrue(true)
    }, 2000);

  }
In this function, we are calling a few functions, getLongLat, this is where we're going to get the longitude and latitude of the city we've put in the state variable. We're also calling getWeather, which will as you've probably guessed, get the weather data we want. We're then using the setTimeout function, to make sure our call to setMarkerTrue doesn't happen until two seconds later.
The next thing we want to do is update our handleKeyDown function to add a call for this getData function like so:
    const handleKeyDown = (e) => {
        if (e.keyCode === 13){
          getData();
        }
      }
now we need to add functions for our getLongLat and getWeather:
    const getLongLat = () => {
        fetch(`https://api.api-ninjas.com/v1/geocoding?city=${state.city}&country=${state.country}`, requestOptions)
        .then(response => response.json())
        .then((data) => {
            const newViewport = {
            width: "100vw",
            height: "100vh",
            longitude: data[0].longitude,
            latitude: data[0].latitude,
            zoom: 10
            };
            setViewport(newViewport);
        });
    }

    const getWeather = () =>{
        console.log(state.city);
        fetch(`https://api.api-ninjas.com/v1/weather?city=${state.city}`, requestOptions)
        .then(response => response.json())
        .then((response) => {
            console.log(`Temperature: ${response.temp} celcius.`);
            setState({city: state.city, temperature: response.temp, humidity: response.humidity, windSpeed: response.wind_speed});
        })
        .catch((error) => console.log(`Error: ${error}`));
    }
Our getLongLat function, makes a callout to API Ninjas' geocoding api to get coordinates for the city we want to find the weather information for. We pass the api the city property from our state object to the api url and because there can be multiple cities returned from the api, we target the first object in the response by calling the 0th value. For example, the search for London results in the following response from the API:
[
    {
        "name": "London",
        "latitude": 51.5085,
        "longitude": -0.1257,
        "country": "GB"
    },
    {
        "name": "London",
        "latitude": 42.9834,
        "longitude": -81.233,
        "country": "CA"
    },
    {
        "name": "London",
        "latitude": 39.8865,
        "longitude": -83.4483,
        "country": "US",
        "state": "OH"
    },
    {
        "name": "London",
        "latitude": 37.129,
        "longitude": -84.0833,
        "country": "US",
        "state": "KY"
    },
    {
        "name": "London",
        "latitude": 36.4761,
        "longitude": -119.4432,
        "country": "US",
        "state": "CA"
    }
]
In our getWeatherData function, we are making a callout to the weather api service from API Ninjas. We are retrieving a number of properties from the object returned and passing them into our state object.
To get our API Callout working, we need to set a new state variable, requestOptions:
  const requestOptions = {
    method: 'GET',
    headers:{
      'X-Api-Key': '[your API Key]',
      'Content-Type': 'application/json',
    }
  }
Step 6: put a marker on the map
Now we want to place a marker on the map, and create a popup to show the weather data. So we want to pass the following state variables to the top of our function with the rest:
  const [popupTrue, setPopupTrue] = useState(null);
  const [markerTrue, setMarkerTrue] = useState(null);
To create a marker on the map, we'll need an image. Grab any image that you like to represent your marker. I've chosen one that looks like the weather app logo on IOS. Save this file to your public folder in your app directory. You're going to need to add the Marker component to your 'react-map-gl' import. You may as well also include the import for the Popup component as well at this point. Next we want to add the marker inside our ReactMapGL element like so:
import ReactMapGL, { Marker, Popup } from 'react-map-gl';
import 'bootstrap/dist/css/bootstrap.min.css';
import { Button, InputGroup, FormControl } from 'react-bootstrap';
import { useState } from 'react';

function Map(){
    const [viewport, setViewport] = useState({
        width: "100vw",
        height: "100vh",
        latitude: 41.3874,
        longitude: 2.1686,
        zoom: 8
      });

    const [state, setState] = useState({
    city:'',
    country: '',
    temperature: 0,
    windSpeed: null,
    humidity: null,
    });

    const [popupTrue, setPopupTrue] = useState(null);
    const [markerTrue, setMarkerTrue] = useState(null);

    const requestOptions = {
        method: 'GET',
        headers:{
          'X-Api-Key': '[your api key]',
          'Content-Type': 'application/json',
        }
    }


    const updateCity = (e) => {
        setState({city: e.target.value});
    }

    const handleKeyDown = (e) => {
        if (e.keyCode === 13){
          getData();
        }
      }

    const getData = () => {
        getLongLat();
        getWeather();
        setTimeout(() => {
            setMarkerTrue(true)
        }, 2000);
    }

    const getLongLat = () => {
        fetch(`https://api.api-ninjas.com/v1/geocoding?city=${state.city}&country=${state.country}`, requestOptions)
        .then(response => response.json())
        .then((data) => {
            const newViewport = {
            width: "100vw",
            height: "100vh",
            longitude: data[0].longitude,
            latitude: data[0].latitude,
            zoom: 10
            };
            setViewport(newViewport);
        });
    }

    const getWeather = () =>{
        console.log(state.city);
        fetch(`https://api.api-ninjas.com/v1/weather?city=${state.city}`, requestOptions)
        .then(response => response.json())
        .then((response) => {
            console.log(`Temperature: ${response.temp} celcius.`);
            setState({city: state.city, temperature: response.temp, humidity: response.humidity, windSpeed: response.wind_speed});
        })
        .catch((error) => console.log(`Error: ${error}`));
    }

     return(
            <ReactMapGL
            {...viewport}
            onViewportChange={(viewport) => setViewport(viewport)}
            mapboxApiAccessToken="[your token goes here]"
            mapStyle="[your style url goes here]" >
                <InputGroup className="input-frm">
                    <InputGroup.Text className="input-lbl">City:</InputGroup.Text>
                    <FormControl aria-label="Input City" value={state.city} placeholder="enter city" onChange={(e) => updateCity(e)} onKeyDown={handleKeyDown} />
                    <Button variant="success" onClick={getData} >Search</Button>
                </InputGroup>
                {markerTrue ? (
                    <Marker
                    key={state.city}
                    longitude={viewport.longitude}
                    latitude={viewport.latitude}>
                        <img className="weather-icon" src="/weather.png" alt="weather icon" onClick={(e) => {
                        setPopupTrue(true);
                        }} />
                    </Marker>
                ): null}

        </ReactMapGL>
     );

}


export default Map;
let's add some styling to our marker to make sure it looks right, in your index.css file add the following styles:
.weather-icon {
  width: 100px;
  height: 100px;
  padding: 0;
  cursor: pointer;
}
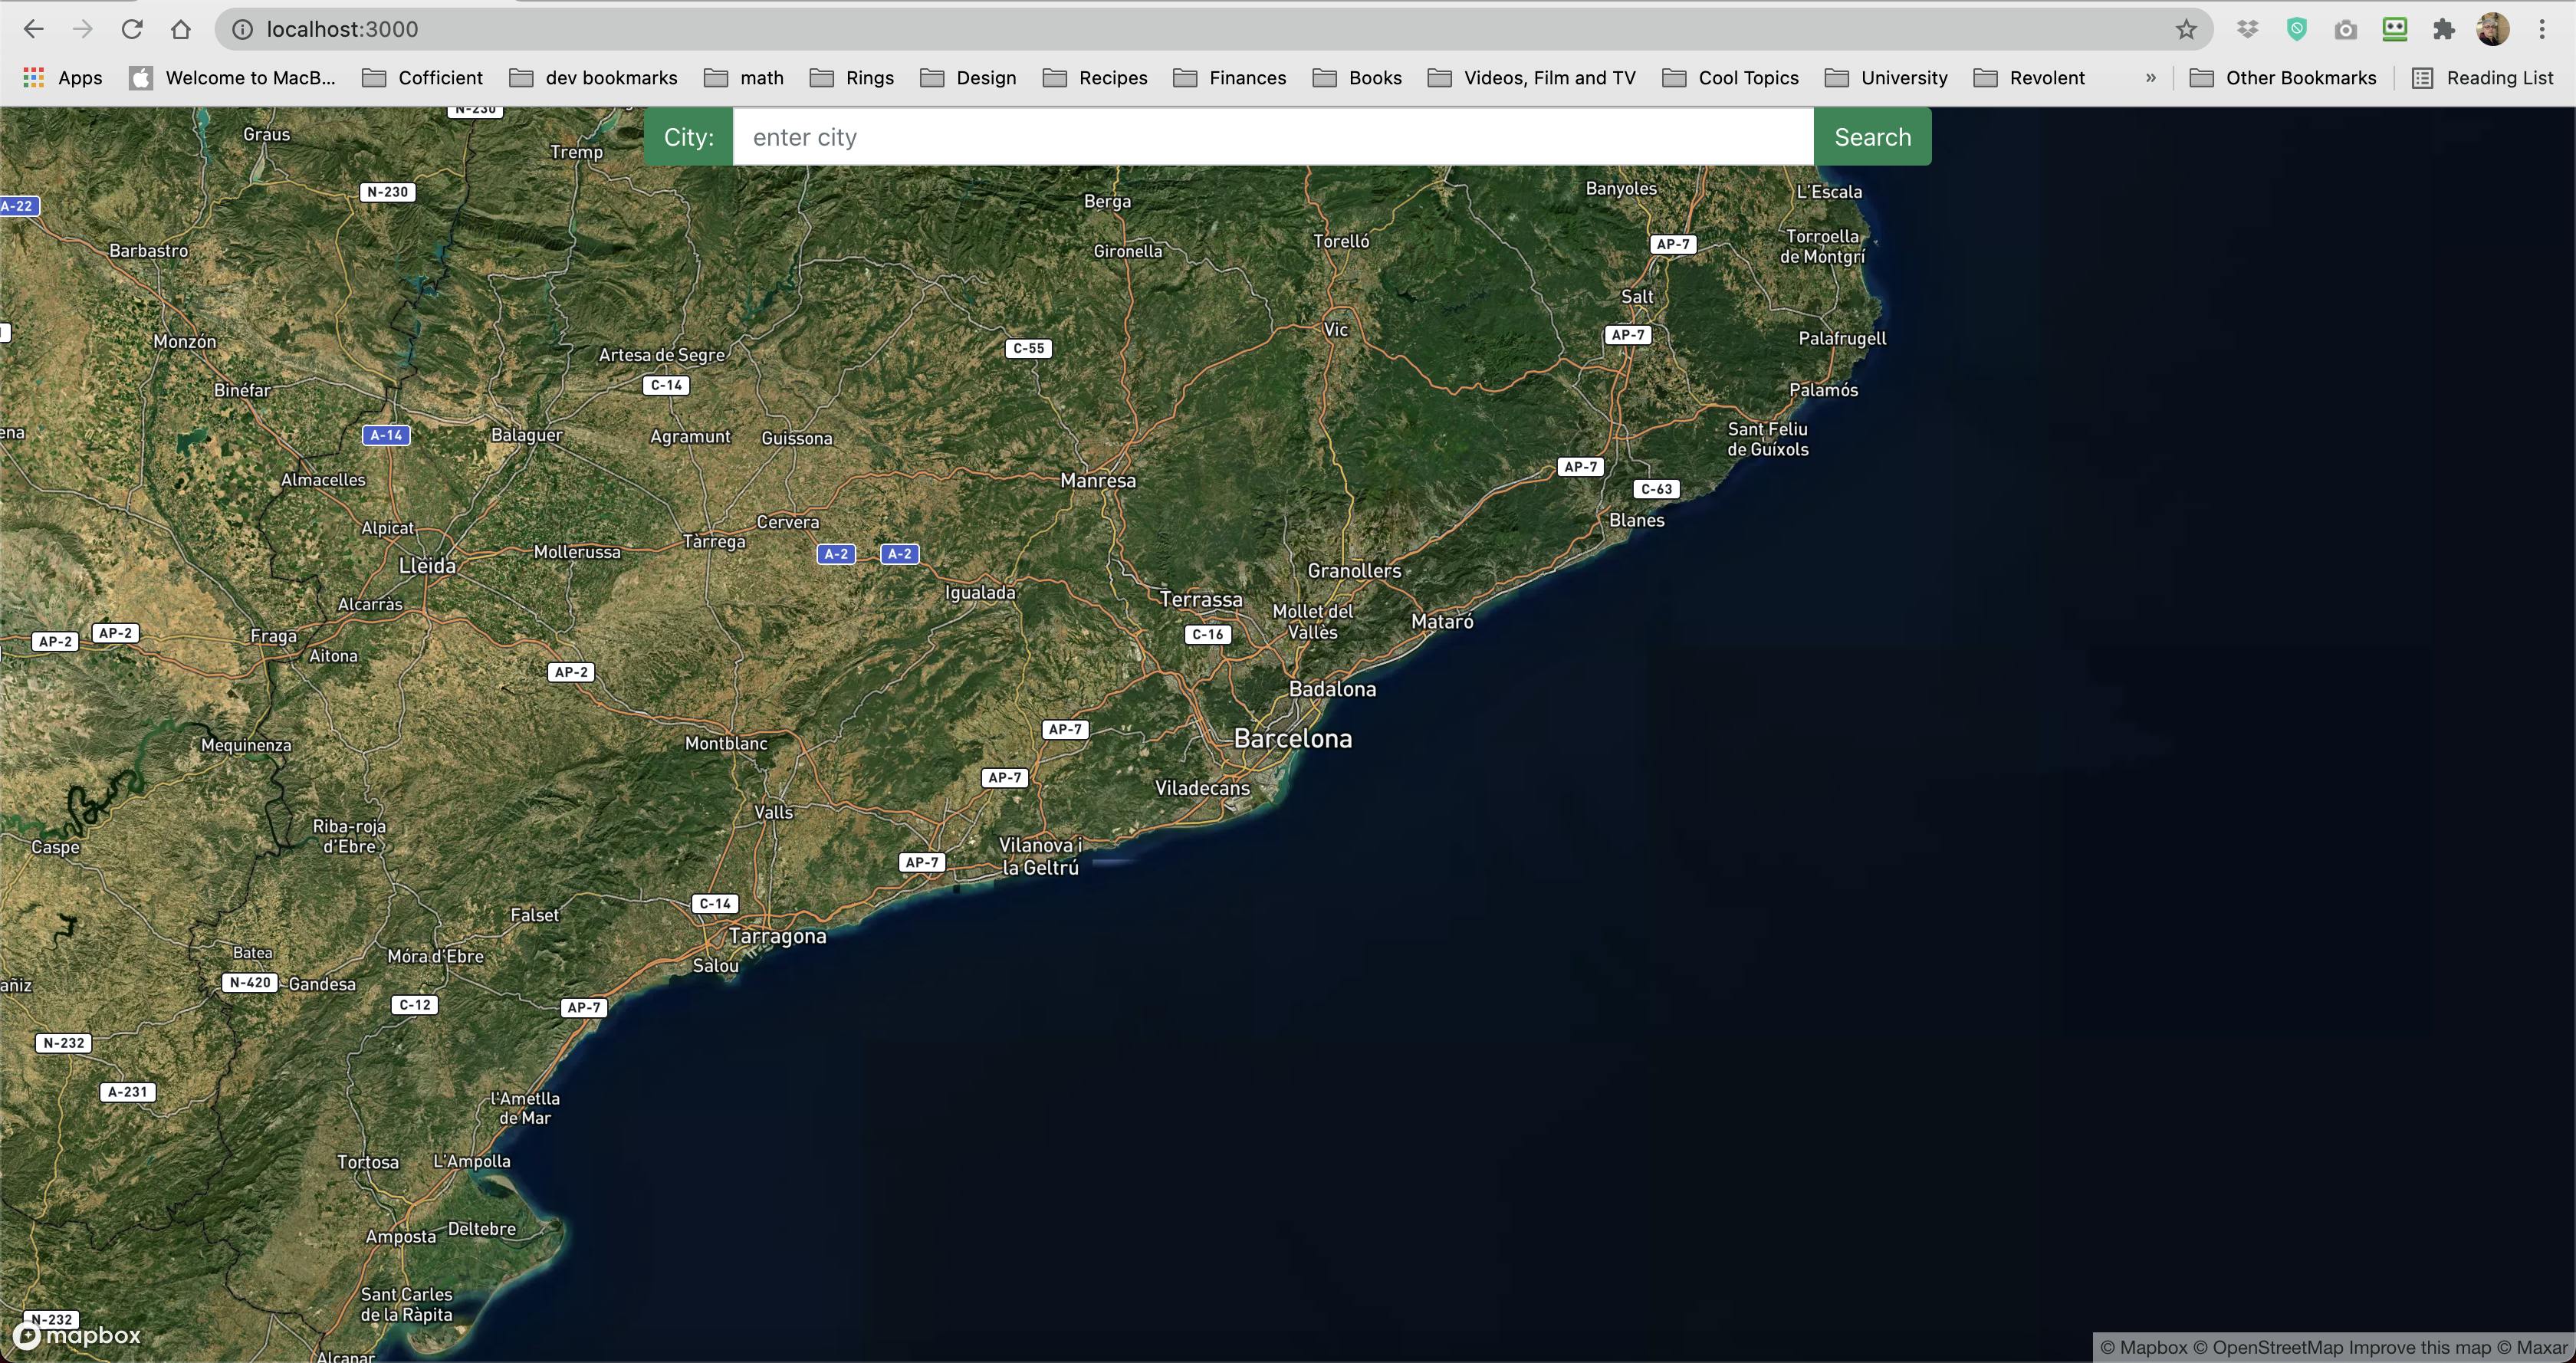
It should look like this if you search for London:
Step 7: display the data
Next we want to add and style the popup for our app to display the weather information we requested in Step 5. Let's add the following code to the ReactMapGL component:
<ReactMapGL
            {...viewport}
            onViewportChange={(viewport) => setViewport(viewport)}
            mapboxApiAccessToken="[your token goes here]"
            mapStyle="[your style url goes here]" >
                <InputGroup className="input-frm">
                    <InputGroup.Text className="input-lbl">City:</InputGroup.Text>
                    <FormControl aria-label="Input City" value={state.city} placeholder="enter city" onChange={(e) => updateCity(e)} onKeyDown={handleKeyDown} />
                    <Button variant="success" onClick={getData} >Search</Button>
                </InputGroup>
                {markerTrue ? (
                    <Marker
                    key={state.city}
                    longitude={viewport.longitude}
                    latitude={viewport.latitude}>
                        <img className="weather-icon" src="/weather.png" alt="weather icon" onClick={(e) => {
                        setPopupTrue(true);
                        }} />
                    </Marker>
                ): null}

            {state.temperature && popupTrue ? (
                <Popup latitude={viewport.latitude} longitude={viewport.longitude} >
                <div className="pop-up">
                    <h4>{state.city}</h4>
                    <p>Temp: {state.temperature}° C</p>
                    <p>Wind Speed: {state.windSpeed} mph</p>
                    <p>Humidity: {state.humidity}%</p>
                </div>
                </Popup>
            ) : null}

</ReactMapGL>
To make our popup a little nicer looking, we can add the following css to our index.css stylesheet:
.mapboxgl-popup {
  margin-left: 3%;
}

.mapboxgl-popup-close-button {
  display: none;
}
Run your app, and you should see something like this:
